Step by Step: Creating Custom Colour using Tape Hair Extensions
Work some seamless colour magic with tape hair extensions thanks to this step by step by Katy Grimshaw, Founder of Spectrum One Hair Extensions.
Step 1: Select Your Shades
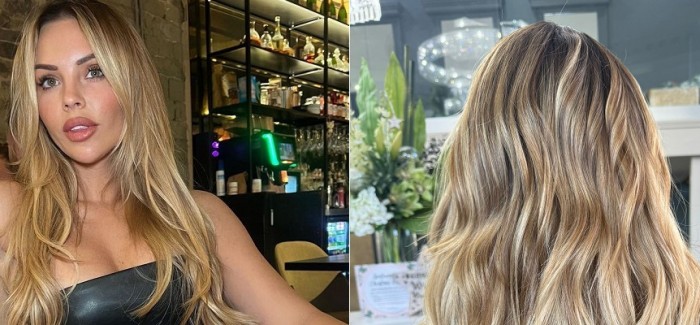
The key to a seamless colour blend when using tapes is to blend colours together. Tape application works by sandwiching two tapes together, one on the top of the natural hair, and one below. A regular application would consist of the top and bottom tape matching, but with this technique you choose two different shades.
When selecting the first colour Katy always matches to the ends of the natural hair, not the root. Then for the second shade you have to decide if to add a pop of lightness, or depth. For this to work, and look seamless, you’ll need to create a ‘bridging tone’. This is about half a shade lighter, or darker, than the natural hair or root that’s coming through, and acts as a guide to selecting the second shade. Katy usually opts for a mixed colour or a balayage option in the Spectrum One Hair Extensions tapes, as opposed to a solid colour, for this.
Step 2: Perfect The Blend
The aim of the game is to pick up as many tones in the hair as you can with your two shade selections. To install, you take your lighter mixed colour shade option, then you sandwich that together with your bridging tone running through, or maybe another neutral colour depending on the look you want to create. Katy loves mixing colours together to get a seamless custom blend so she made sure that Spectrum One Hair Extensions were available to purchase in 50 gram packs instead of large packs that are expensive and leave you with lots of her left over post blend.

Step 3: Consider Your Cutting Technique
If you choose the right shades the blend should come easily!
Pre tape install, you have the option to thin out the clients natural hair towards the end to assist with the blending process.
To perfect it even more, Katy always over directs the haircut as she moves around the head. To do this she pulls hair from one side of the head over to the other, carving through the middle with her cutting technique to blend the natural hair with the extensions; you can do this with both scissors or a razor. This is really easy to personalise for each client depending on what they’re looking for in terms of the final finish. Doing it this way you can maintain the length whilst blending the natural hair with the extensions, which most extensions clients want, even though we’re adding some layers.
Step 4: Finish It Off
Katy Loves use O&M Know Knott Detangling Spray on the extensions and lengths first of all, and then cocktail together O&M Frizzy Logic Shine Serum and their Project Sukuroi to create a really impressive shiny, high gloss finish which also feeds and nourishes the hair – both natural and extensions.
For more inspo visit www.spectrumonehair.com